Handling AI/ML Workloads on NVIDIA GPU Nodes in Kubernetes: A Guide
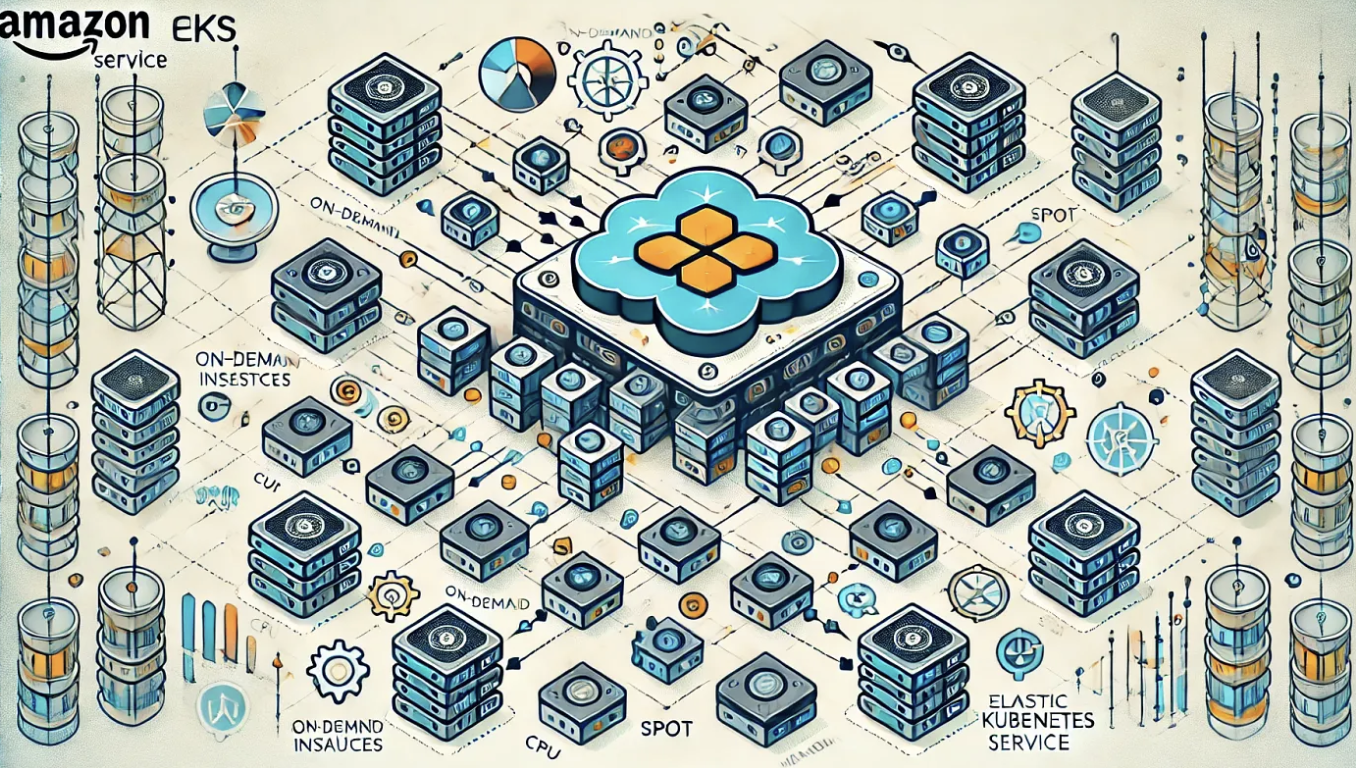
With the pace of recent developments in AI, it's become essential to keep up on the infrastructure side too — there's no AI without heavy GPU nodes behind it. If you're deploying models on a Kubernetes cluster, you need to understand the full lifecycle of provisioning and scaling GPU nodes on an EKS cluster.
This guide walks through that lifecycle end to end, using four tools: the NVIDIA GPU Operator, AWS's Karpenter, and the Helm and kubectl CLIs (k9s is handy for watching it all happen, but not required).
I work as a Cloud Engineer on a Kubernetes platform team, and this is the problem statement I was handed:
We need a mechanism to provision and scale GPU nodes in an EKS cluster so that the ML engineers can train and test their models on them. How do you plan to achieve such scale on an EKS cluster?
Break that down and it's really two problems: provisioning and scaling.
- Provisioning — creating and configuring the EC2 nodes on an EKS cluster that will actually run your Kubernetes workloads (pods).
- Scaling — technically part of provisioning too, but scaling is specifically about how your worker nodes scale out or in as traffic load changes, and it has a lot to do with node consolidation.
GPU Operator + Karpenter
Wait, what's GPU Operator?
- GPU Operator is an open-source project from NVIDIA responsible for provisioning a GPU node for any heavy AI/ML workload that's pending to be scheduled on the cluster.
- It uses the Kubernetes operator framework to automate the management of every NVIDIA software component a GPU node needs.
- Those components include the NVIDIA drivers (to enable CUDA), the Kubernetes device plugin for GPUs, the NVIDIA Container Runtime, automatic node labelling (to mark a node as a GPU node), DCGM-based monitoring, and others.
- Using GPU Operator means you're not manually creating and babysitting each of those components — which used to be the case with the standalone NVIDIA Device Plugin.
The GPU Operator workflow
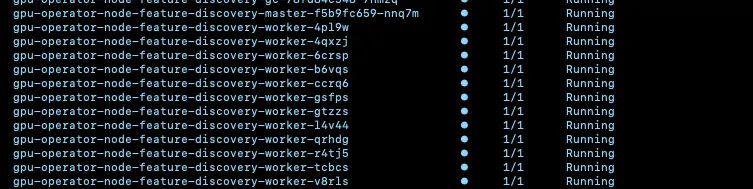
The GPU Operator deployment consists of a single gpu-operator-node-feature-discovery-master pod, which schedules a gpu-operator-node-feature-discovery-worker pod on every node in the cluster (a DaemonSet).
When one of those worker pods discovers a GPU node being scheduled, it automatically configures the nvidia-container-toolkit-daemonset, nvidia-cuda-validator, nvidia-dcgm-exporter, nvidia-device-plugin-daemonset, nvidia-driver-daemonset, and nvidia-operator-validator pods on that node to handle the AI/ML workload being scheduled there.
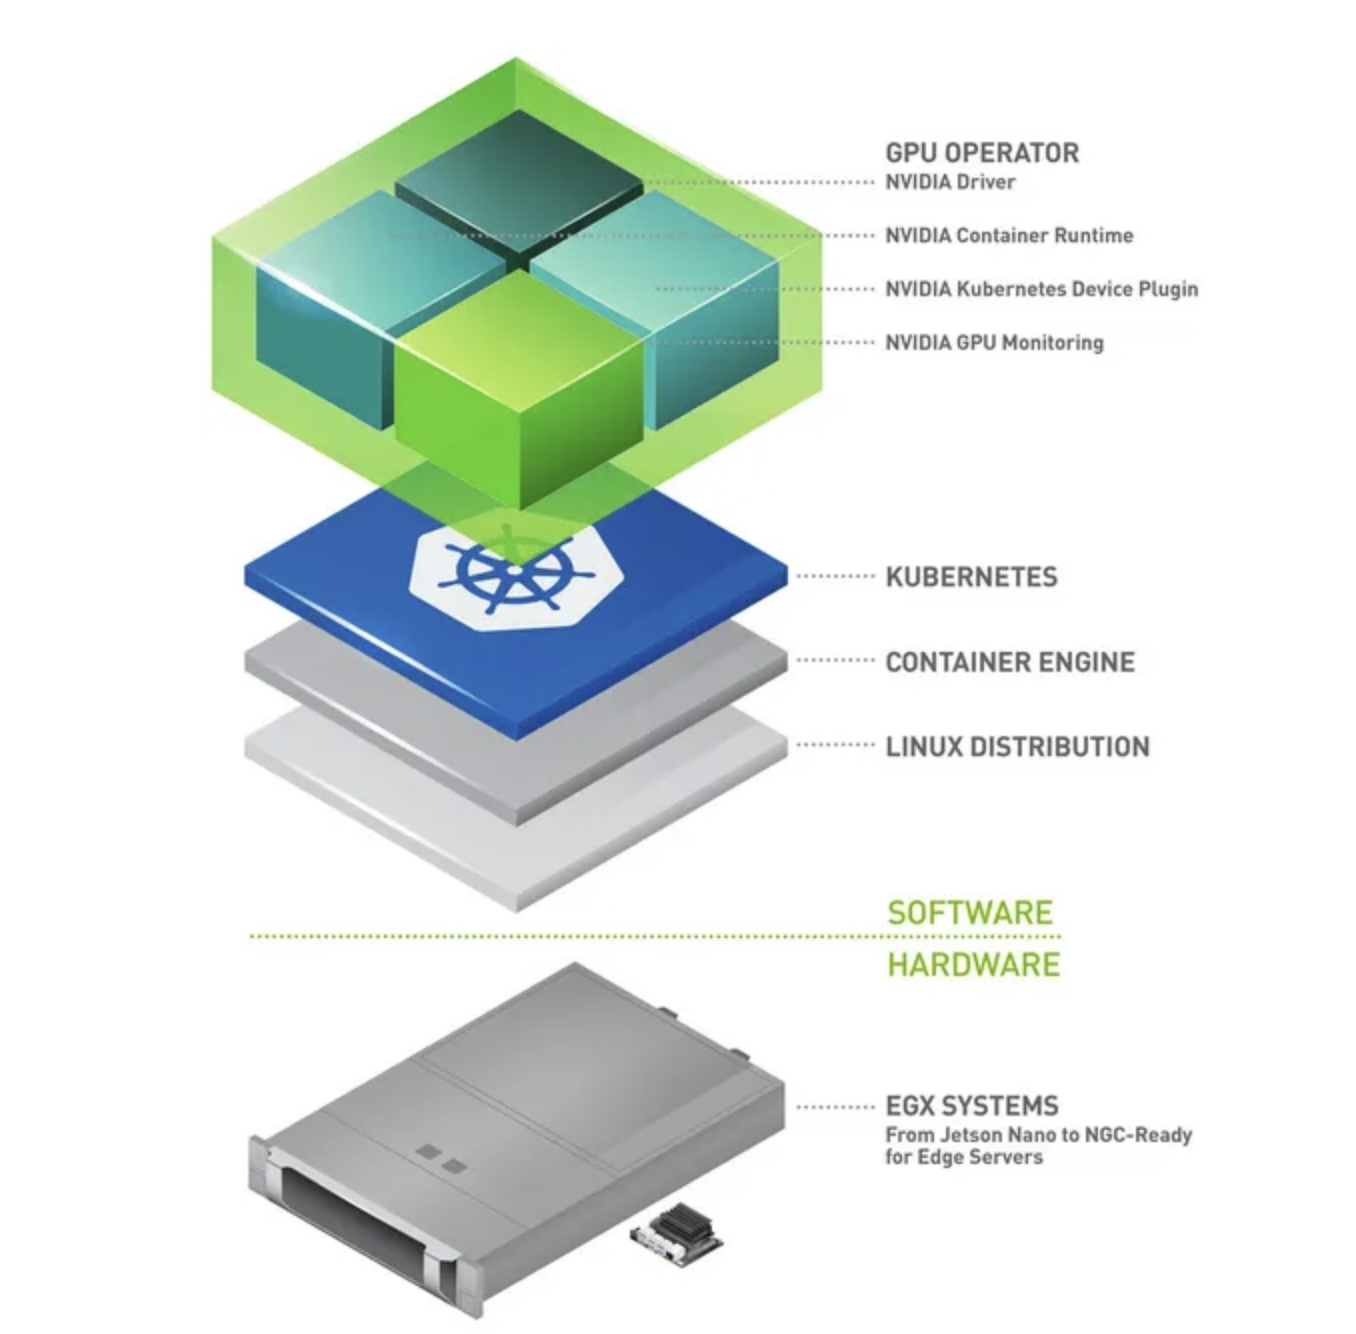
In short: GPU Operator is responsible for provisioning a GPU node with everything it needs to actually run the workload scheduled onto it.
Okay, but why Karpenter?
In simple terms, Karpenter is a cluster autoscaler built by AWS that intelligently manages the nodes in an EKS cluster. If you have a pending pod that needs a node, Karpenter provisions one for it. It can also save real money, since it automatically consolidates nodes based on usage — which makes it a step up from the vanilla Cluster Autoscaler.
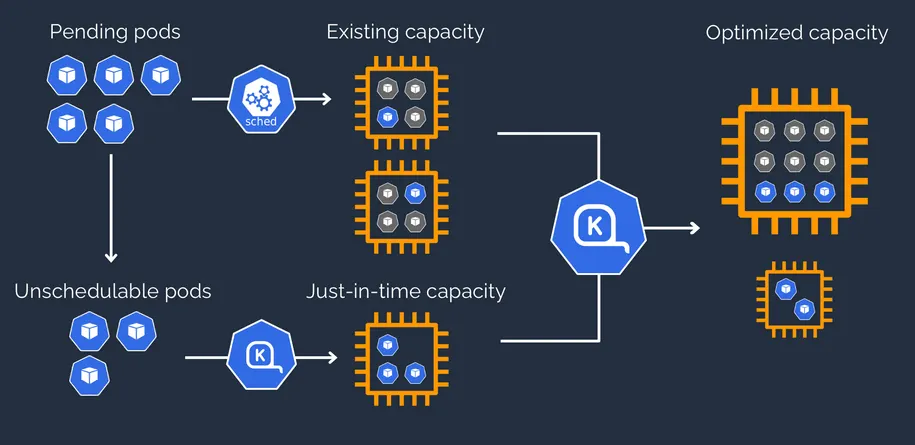
This isn't a Karpenter tutorial, so I won't go deeper into Karpenter itself here — the official docs are a good place to start. We'll be using both Karpenter and GPU Operator together to solve the problem above.
Prerequisites
- The Helm CLI is installed.
- You have kubectl access to your EKS cluster.
Step 1: Install the NVIDIA GPU Operator
Get the latest version of the official NVIDIA GPU Operator chart. I used v23.9.1, installed via the Helm CLI:
helm fetch nvidia/gpu-operator --untar --version=v23.9.1To verify the install, you should see a single gpu-operator-node-feature-discovery-master pod and a gpu-operator-node-feature-discovery-worker pod running on every existing node in the cluster:
Step 2: Install Karpenter
Get the latest Karpenter chart. I used v0.35.1, also via the Helm CLI:
helm fetch karpenter/karpenter --untar --version=v0.35.1To verify, you should see the desired number of Karpenter controller replicas running in your cluster:

Step 3: Create a Karpenter EC2NodeClass and NodePool
The EC2NodeClass defines the AMI, networking, IAM, and storage a Karpenter-provisioned node should use:
apiVersion: karpenter.k8s.aws/v1beta1
kind: EC2NodeClass
metadata:
  name: <EC2NODECLASS-NAME>
spec:
  amiFamily: <AMI-FAMILY>
  subnetSelectorTerms:
    - tags:
        <KEY>: <VALUE>
  securityGroupSelectorTerms:
    - tags:
        karpenter.sh/discovery: <CLUSTER-NAME>
  role: <INSTANCE-PROFILE>
  amiSelectorTerms:
    - id: <AMI-ID>
  userData: |
    <USER-DATA-SCRIPT.sh>
  tags:
    karpenter.sh/discovery: <CLUSTER-NAME>
    Name: <EC2NODECLASS-NAME>
  blockDeviceMappings:
    - deviceName: /dev/xvda
      ebs:
        volumeSize: <DISK-SIZE>
        volumeType: <DISK-TYPE>
        encrypted: true
The NodePool then defines which instance types and capacity types Karpenter is allowed to launch for a pending pod — this is also where the GPU taint goes, so only GPU-tolerant pods land on these nodes:
apiVersion: karpenter.sh/v1beta1
kind: NodePool
metadata:
  name: <NODEPOOL-NAME>
spec:
  template:
    metadata:
      labels:
        <KEY>: <VALUE>
    spec:
      nodeClassRef:
        apiVersion: karpenter.k8s.aws/v1beta1
        kind: EC2NodeClass
        name: <EC2NODECLASS-NAME>
      requirements:
        - key: "node.kubernetes.io/instance-type"
          operator: In
          values: [<CHOOSE-YOUR-INSTANCE-TYPE>]
        - key: "karpenter.sh/capacity-type"
          operator: In
          values: ["on-demand"]
        - key: "kubernetes.io/arch"
          operator: In
          values: ["arm64"]
        - key: "kubernetes.io/os"
          operator: In
          values: ["linux"]
      # Taint the node so only AI/ML pods get scheduled on GPU nodes
      taints:
        - key: nvidia.com/gpu
          value: "dedicated"
          effect: NoSchedule
  limits:
    cpu: <CPU-LIMIT>
    memory: <MEMORY-LIMIT>
  disruption:
    consolidationPolicy: WhenUnderutilized
    expireAfter: "1209600s" # 14 days = 2 * 7 * 24 * 60 * 60 seconds
Fill in your own values and deploy both with kubectl:
kubectl apply -f ec2nodeclass.yaml
kubectl apply -f nodepool.yaml
Step 4: Deploy a test ML pod
Create a sample deployment. The toleration is what lets this pod actually land on the tainted GPU node, and the resource limit is what tells the scheduler it needs a GPU in the first place:
apiVersion: apps/v1
kind: Deployment
metadata:
  name: <DEPLOYMENT-NAME>
spec:
  replicas: <NUMBER-OF-REPLICAS>
  selector:
    matchLabels:
      app: <DEPLOYMENT-NAME>
  template:
    metadata:
      labels:
        app: <DEPLOYMENT-NAME>
    spec:
      # Toleration added so the pod gets scheduled only on the GPU node
      tolerations:
        - key: nvidia.com/gpu
          operator: Exists
          effect: NoSchedule
      containers:
        - name: hello-app-runner
          image: public.ecr.aws/aws-containers/hello-app-runner:latest
          resources:
            limits:
nvidia.com/gpu: 1kubectl apply -f deploy-test-gpu-node-group.yamlAs soon as this is deployed, Karpenter kicks in to provision the GPU node. Once that node reaches Ready, GPU Operator kicks in to configure the software components the ML pod needs:



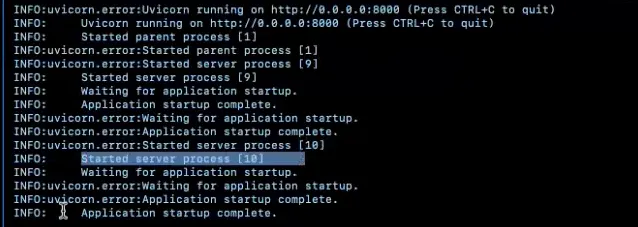
Check the pod's logs to confirm it's actually healthy on the GPU node:
Once you're done, delete the test deployment:
kubectl delete -f deploy-test-gpu-node-group.yamlThis is where Karpenter's other job shows up: once the deployment is gone and the GPU node is no longer needed, Karpenter consolidates and terminates it automatically — no one has to remember to clean it up, and no one pays for an idle GPU node overnight.
Key takeaways
- GPU Operator owns the software side of a GPU node: drivers, container runtime, device plugin, and monitoring, all installed automatically the moment a GPU node joins the cluster.
- Karpenter owns the infrastructure side: it provisions the right EC2 instance for a pending GPU pod, and consolidates it away again the moment it's idle.
- A taint on the NodePool plus a matching toleration on the workload is what keeps GPU nodes reserved for GPU workloads, instead of general-purpose pods drifting onto expensive hardware.
- Together, the two tools mean nobody on the ML team has to manually provision, configure, or tear down a GPU node just to train or test a model.
Written by Shubham Jain, Cloud Engineer at Newspresso Tech.
More posts
How I Built an AI-Powered Lead Qualification & Routing System in n8n (Production-Ready)
A webhook-driven n8n workflow that validates inbound leads, scores intent with a guardrailed AI agent, and routes each one — CRM deal, Slack ping, drafted email, or just a log line — based on how hot it actually is.
Building an AI-Powered Ad Generation System for Businesses 💸
An end-to-end n8n workflow that turns a product name, description, and a couple of photos into a fully edited, titled, thumbnailed video ad — uploaded straight to YouTube, no manual editing.
How I Built a Production-Safe Webhook Intake System in n8n
Why most automations fail before AI or CRMs ever get involved — and the defensive n8n webhook pattern that stops bad data at the door: validate, normalize, respond deterministically, no silent failures.